 Save
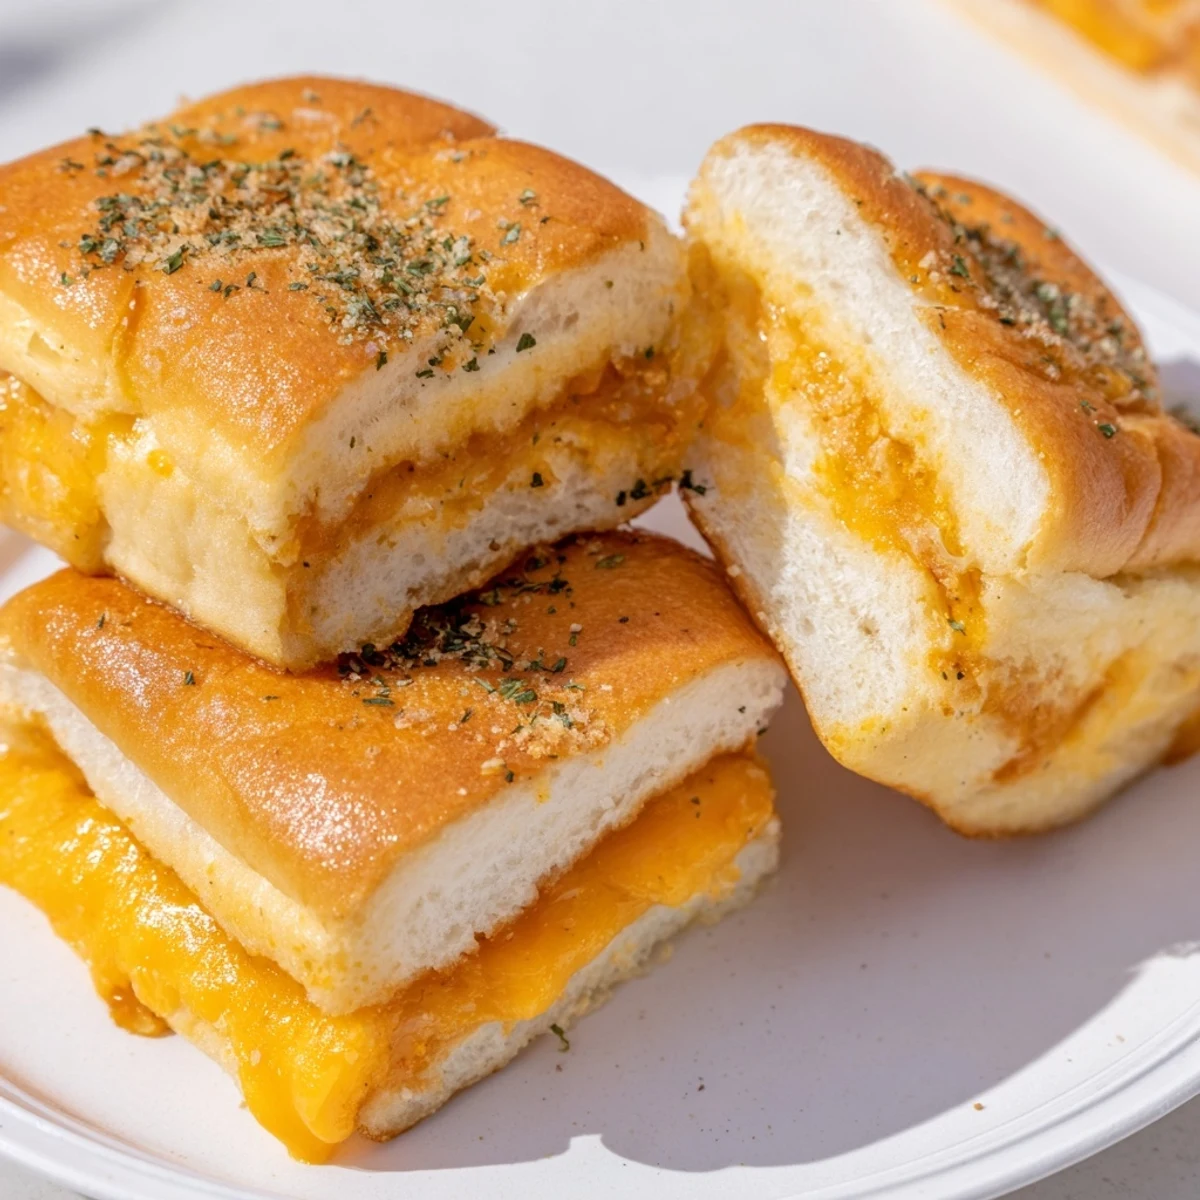
Save These bite-sized sandwiches start with a package of sweet Hawaiian rolls sliced horizontally. Layer sharp cheddar cheese between the fluffy rolls, then brush generously with melted butter seasoned with garlic powder and dried parsley. Bake covered for 10 minutes to heat through, then uncover and continue baking until the tops turn golden brown and cheese bubbles. Let rest briefly before cutting apart into twelve handheld mini sandwiches.
My sister showed up unannounced last Tuesday with a grocery bag full of Hawaiian rolls and "an experiment we have to try right now." We stood in my kitchen at 10 PM, cutting through that entire package of connected rolls without separating them first, both of us skeptical about whether this lazy trick would actually work. The smell that filled my oven made us forget we were already in our pajamas. We ate them standing up, burned fingers and all.
Last month I brought these to a friends game night and watched them disappear in under seven minutes flat. Someone actually asked for the recipe like I had invented something revolutionary instead of just melting cheese on grocery store rolls. Now theyre the only thing my niece requests when she visits, and honestly, I am not complaining about making them.
Ingredients
- 1 package Hawaiian sweet rolls (12 count): The slight sweetness is what makes these sing, do not substitute with plain dinner rolls
- 8 oz cheddar cheese sliced: Sharp cheddar cuts through the sweetness, but any melting cheese works in a pinch
- 2 tbsp unsalted butter melted: Brushing the tops gives them that golden finish people cannot stop talking about
- Optional Dijon mustard and mayonnaise: Whisk these together for a tangy layer that keeps the bread from getting soggy
- Garlic powder and dried parsley: These turn simple buttered rolls into something that tastes like they came from a restaurant
Instructions
- Preheat your workspace:
- Set your oven to 350°F and line a baking sheet with parchment paper for easy cleanup later.
- Master the horizontal slice:
- Keep all the rolls connected and carefully cut through the entire package horizontally to create one big top and bottom layer.
- Add your secret layer:
- Whisk together the mustard and mayonnaise if using, then spread it evenly on both cut sides of the bread.
- Layer the cheese:
- Arrange your cheddar slices over the bottom half, making sure every corner will get some cheesy goodness, then place the top back on.
- Butter and season:
- Brush melted butter generously over the top and sprinkle with garlic powder and parsley for that golden finish.
- Bake covered then uncovered:
- Cover loosely with foil for 10 minutes to melt everything through, then remove foil and bake 5 more minutes until golden brown.
- The hardest part:
- Let them rest for 2 minutes before cutting apart into individual sandwiches, otherwise the cheese will run everywhere.
 Save
Save My dad claimed he did not want more than one the first time I made these, then proceeded to eat four while telling me stories about his college days. Food just has a way of making people comfortable enough to share things they otherwise would not say.
Perfect Pairings
These sliders shine alongside a steaming bowl of tomato soup, especially on rainy afternoons when you need maximum comfort. They also work beautifully as part of a spread with pickles, fruit, and other finger foods for casual gatherings.
Make Ahead Strategy
You can assemble these完全 up to an hour before baking, just keep them covered tightly on the counter. I have found that wrapping them in foil during the initial bake actually helps retain moisture if you need to hold them longer.
Customization Ideas
Think of these as a canvas rather than a strict recipe. The base method stays the same but what you put inside can change completely based on what you have in your fridge or what your family loves.
- Layer cooked bacon or thin slices of ham inside for a more substantial version
- Add tomato slices but pat them dry first to prevent soggy bread
- Try pepper jack or mozzarella for completely different flavor profiles
 Save
Save Whether you are feeding a room full of people or just treating yourself on a Tuesday night, these little sandwiches have a way of making everything feel a little more special. That might be the real secret ingredient.
Your Recipe Questions Answered
- → Why use Hawaiian rolls instead of regular bread?
-
The sweetness in Hawaiian rolls balances perfectly with sharp cheddar cheese, creating a sweet and savory flavor profile that regular bread can't match. Their small, uniform size also makes them ideal for party appetizers.
- → Can I make these ahead of time?
-
Yes! Assemble the rolls completely, wrap tightly in foil, and refrigerate for up to 24 hours before baking. Add an extra 5 minutes to the covered baking time if baking cold from the refrigerator.
- → What cheeses work best besides cheddar?
-
Pepper jack adds a spicy kick, mozzarella creates an extra gooey texture, Swiss brings nutty notes, or try a combo of gruyère and provolone for a gourmet twist. Just slice thinly for even melting.
- → How do I prevent the tops from burning?
-
Covering with foil for the first 10 minutes allows the cheese to melt without browning the rolls too quickly. Watch closely during the final uncovered minutes, as the butter and sugars in the rolls can brown fast.
- → Can I freeze these mini sandwiches?
-
Freeze unbaked assembled sandwiches wrapped in plastic then foil for up to 1 month. Thaw overnight in the refrigerator before baking according to instructions. Already baked leftovers freeze well too—reheat in a 350°F oven for 8-10 minutes.
- → What additions make these more substantial?
-
Layer thin slices of cooked bacon or ham inside for extra protein. Add tomato slices for moisture and freshness, or caramelized onions for sweetness. These additions turn them from appetizers into hearty mini meals.