 Save
Save Create a velvety dairy-free dessert that captures the essence of Thai street cuisine. This indulgent treat combines full-fat coconut milk and coconut cream with just the right amount of sweetness. The mixture simmers briefly to dissolve sugar, then chills thoroughly before churning to perfection.
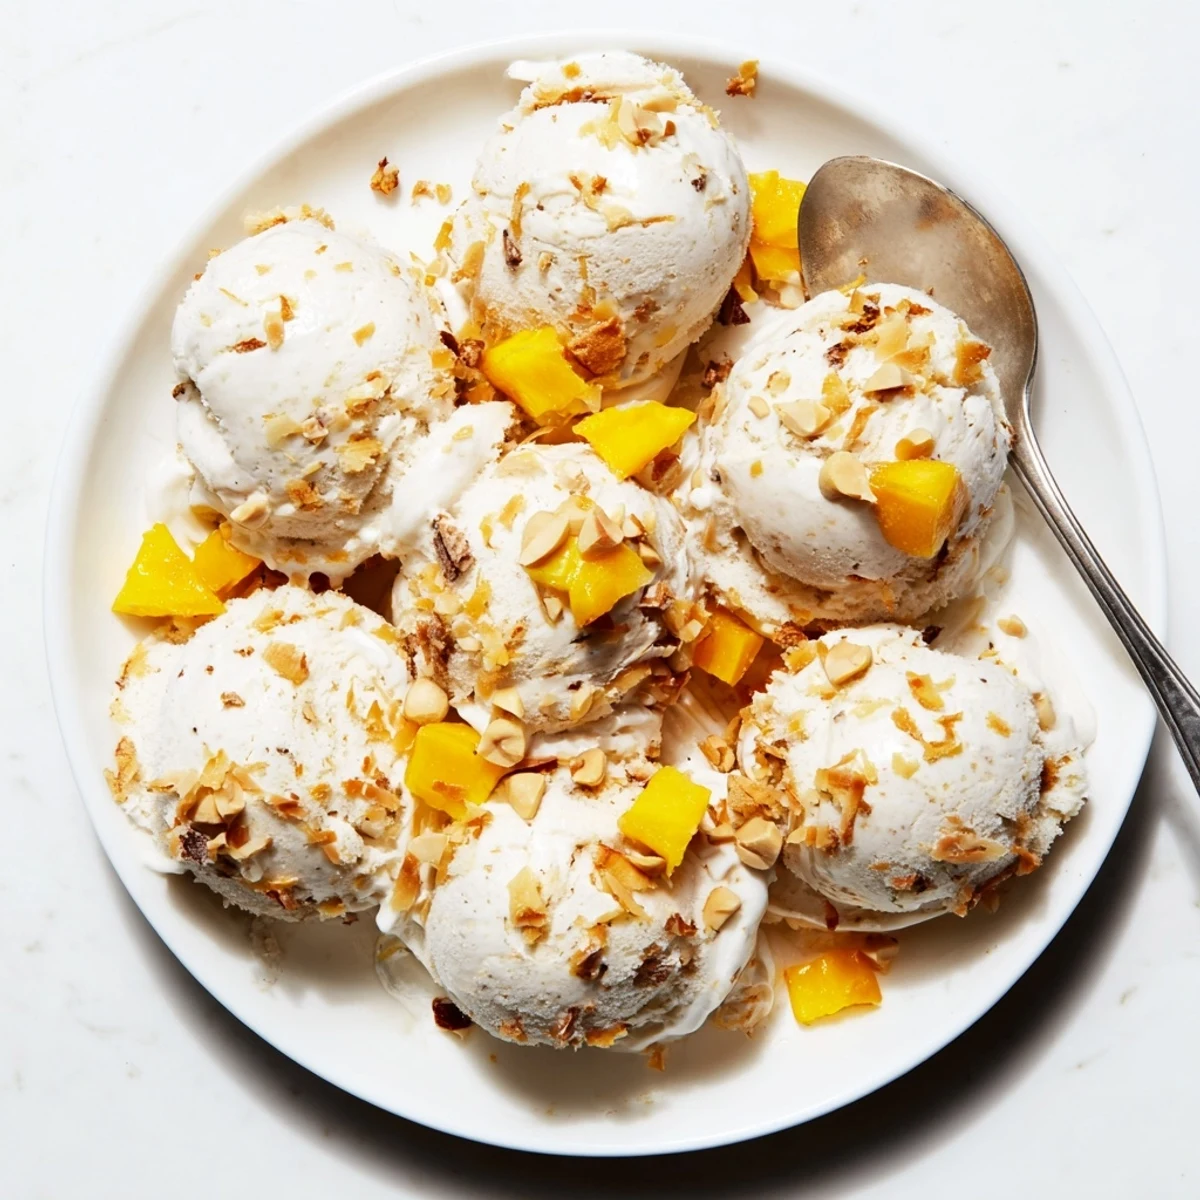
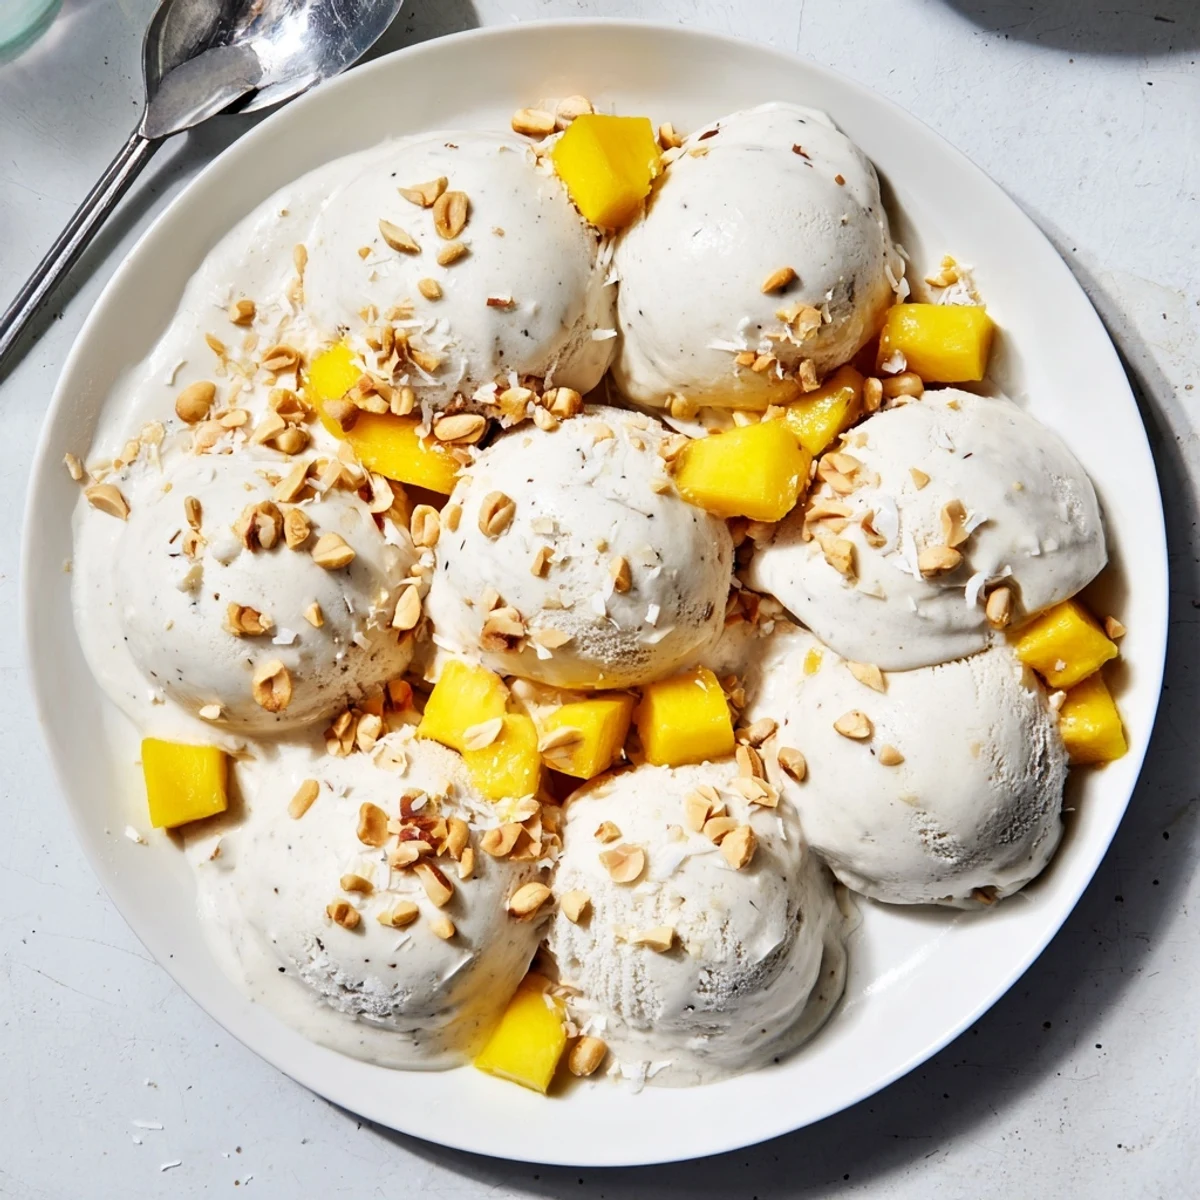
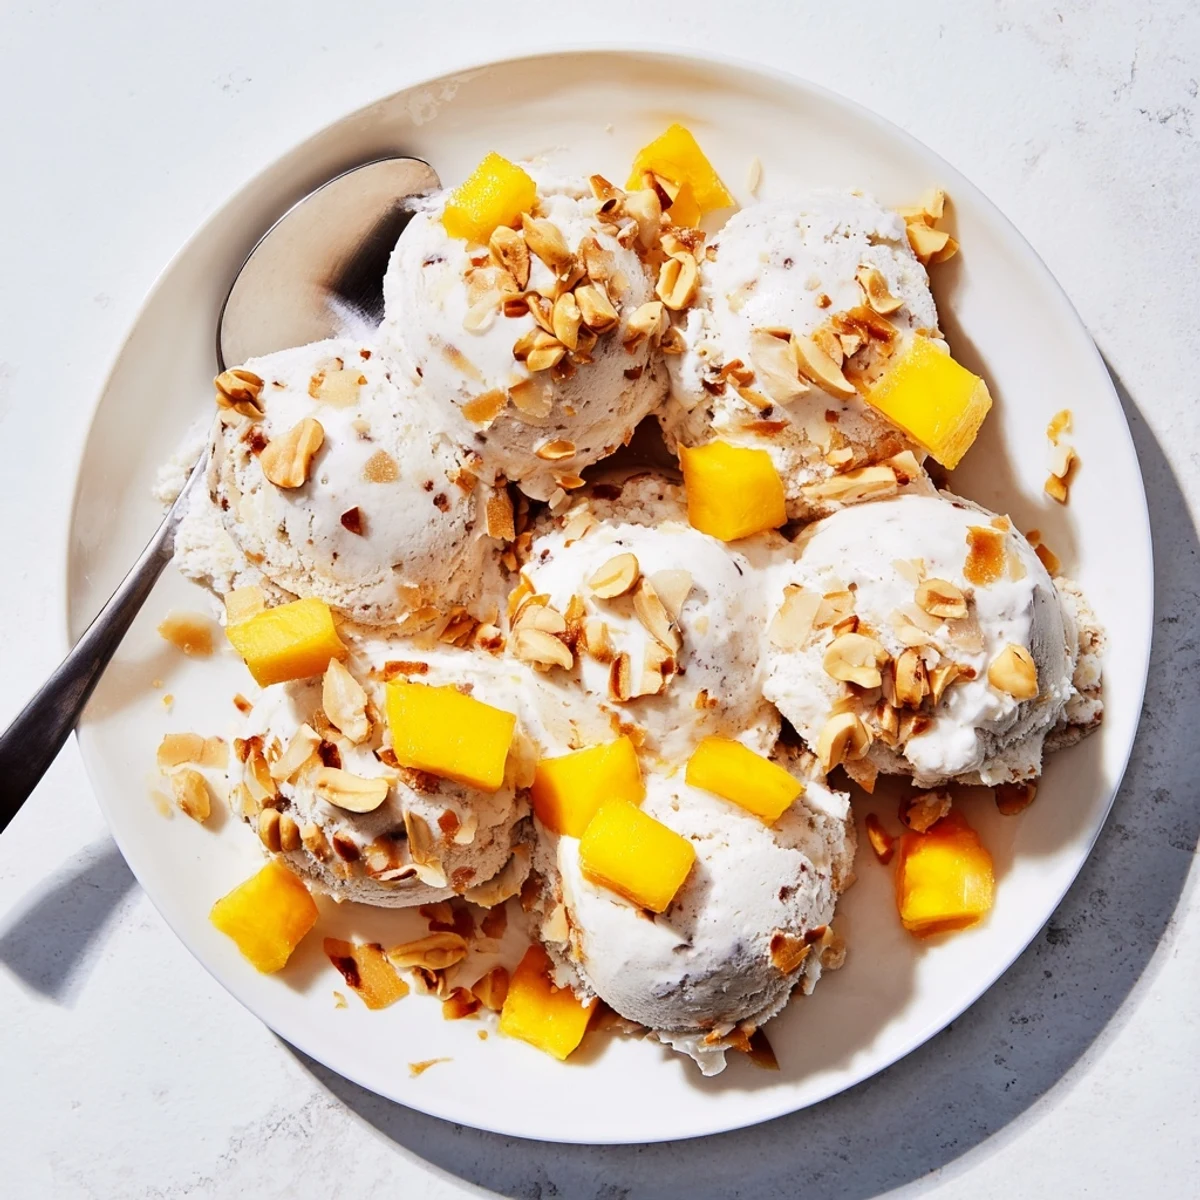
Customize with toasted coconut flakes, chopped roasted peanuts, or fresh diced mango for authentic Thai flair. Perfect for vegans and those avoiding dairy, this frozen delight delivers incredibly creamy texture without any dairy products.
The humidity of a Bangkok market stall lingers in my memory every time I crack open a can of coconut milk. That first taste of handmade coconut ice cream served in a young coconut shell changed everything I thought dessert could be cool tropical and impossibly creamy without a drop of dairy. My tiny apartment kitchen cant quite replicate the street vendor charisma but this recipe captures that same lush velvet magic.
Last summer I served this at a dinner party where half the guests were dairy free and the other half were skeptical coconut dessert people. The silence that fell over the table when everyone took their first bite said more than any compliment could. My friend Sarah actually asked if I was sure about the vegan part and then proceeded to go back for thirds.
Ingredients
- Full fat coconut milk: This is the foundation so dont skimp on fat content or youll miss that luxurious mouthfeel that makes this special
- Coconut cream: The extra richness here is what transforms good coconut ice cream into something transcendent and scoopable
- Granulated sugar: Balances the natural coconut sweetness and helps prevent ice crystals from forming during freezing
- Fine sea salt: Just a pinch wakes up all the flavors and keeps the coconut from tasting too one note
- Pure vanilla extract: Adds that warm aromatic bridge that ties the tropical notes together beautifully
Instructions
- Mix your coconut base:
- Combine coconut milk coconut cream sugar and salt in a medium saucepan over medium heat. Stir constantly until the sugar dissolves completely into the white liquid about 3 to 5 minutes. Keep it away from boiling you just want gentle warmth and full integration.
- Add the vanilla:
- Pull the pan from the heat and stir in your vanilla extract letting those aromatic notes bloom into the warm coconut mixture. The scent will fill your kitchen and suddenly it feels like somewhere tropical.
- Chill thoroughly:
- Let the mixture cool completely to room temperature then refrigerate for at least 2 hours. This step feels like waiting forever but cold base churns faster and freezes smoother so patience pays off here.
- Churn to soft serve:
- Pour the chilled base into your ice cream maker and follow your machines directions usually about 20 to 25 minutes. Watch it transform from liquid to that gorgeous thick soft serve consistency that makes you want to eat it immediately.
- Fold in any mix ins:
- If youre adding toasted coconut flakes roasted peanuts or diced mango fold them in gently at the very end of churning. You want pockets of texture and flavor without breaking down the air you just worked so hard to incorporate.
- Freeze until firm:
- Transfer the ice cream to a freezer safe container with a tight lid and freeze for at least 2 hours. The wait is torture but that firmer texture is what makes it feel like real ice cream rather than just frozen pudding.
- Perfect the scoop:
- Let the container sit on the counter for 5 to 10 minutes before serving. This tiny ritual makes the difference between wrestling with rock hard dessert and that perfect restaurant style scoop.
 Save
Save My niece calls this the vacation ice cream because we first made it together during our beach week last year. She sat on the counter watching the ice cream maker spin with total fascination licking the paddle clean when it stopped. Now whenever she visits she asks if were making the coconut magic and honestly I always say yes.
Getting The Texture Right
The difference between grainy coconut ice cream and the silky version comes down to two things fat content and temperature. I learned this the hard way after three failed batches using light coconut milk that never quite came together. The full fat products plus that patient chilling time before churning make all the difference between a frozen disappointment and something you cannot stop eating.
Flavor Variations Worth Trying
Sometimes I swirl in a ribbon of toasted sesame paste or a splash of pandan extract for that authentic Thai street market vibe. A pinch of cardamom transforms it into something completely different while a handful of fresh basil leaves adds this unexpected herbal note that makes people pause and ask what exactly theyre tasting. The base is so forgiving you can really play around.
Serving Suggestions That Elevate Everything
This coconut ice cream deserves better than just a plain bowl though I will absolutely eat it that way standing in front of the freezer at midnight. Toast some extra coconut flakes until theyre golden brown and sprinkle them on top for that crunch against the creamy base. A drizzle of sweetened condensed milk sends it into dessert heaven and fresh mango chunks turn it into a deconstructed mango sticky rice situation.
- Try serving it inside hollowed out young coconut shells for maximum presentation points
- A sprinkle of Maldon salt on top creates this incredible salted caramel effect
- The leftovers if they exist make the most incredible ice cream sandwiches with ginger cookies
 Save
Save Theres something about the sound of a coconut cracking open or the way toasted coconut smells that instantly transports me somewhere warmer. This ice cream captures that feeling perfectly cool creamy and full of tropical escape.
Your Recipe Questions Answered
- → Can I make this without an ice cream maker?
-
Yes! Pour the chilled mixture into a shallow freezer-safe dish and freeze. Stir every 30 minutes for about 3 hours until smooth. This manual method creates a similar creamy texture.
- → How long does this keep in the freezer?
-
Store in an airtight container for up to 2 weeks. Let sit at room temperature for 5-10 minutes before scooping for the best texture and easiest serving.
- → What makes this Thai-style?
-
The combination of coconut milk and cream reflects traditional Thai desserts. Add pandan extract for authentic flavor or serve with sticky rice for a complete Thai dessert experience.
- → Is this suitable for vegans?
-
Absolutely! This uses only plant-based ingredients—coconut milk, coconut cream, sugar, salt, and vanilla. It's completely vegan, dairy-free, and gluten-free.
- → Can I reduce the sugar?
-
You can reduce sugar slightly, but it helps with texture and prevents ice crystals. For a natural alternative, try maple syrup or agave, though this may slightly alter freezing time.
- → Why must I chill the mixture before churning?
-
Chilling ensures the mixture reaches optimal temperature for churning, resulting in smoother texture. Warm mixtures won't freeze properly and may become icy rather than creamy.