 Save
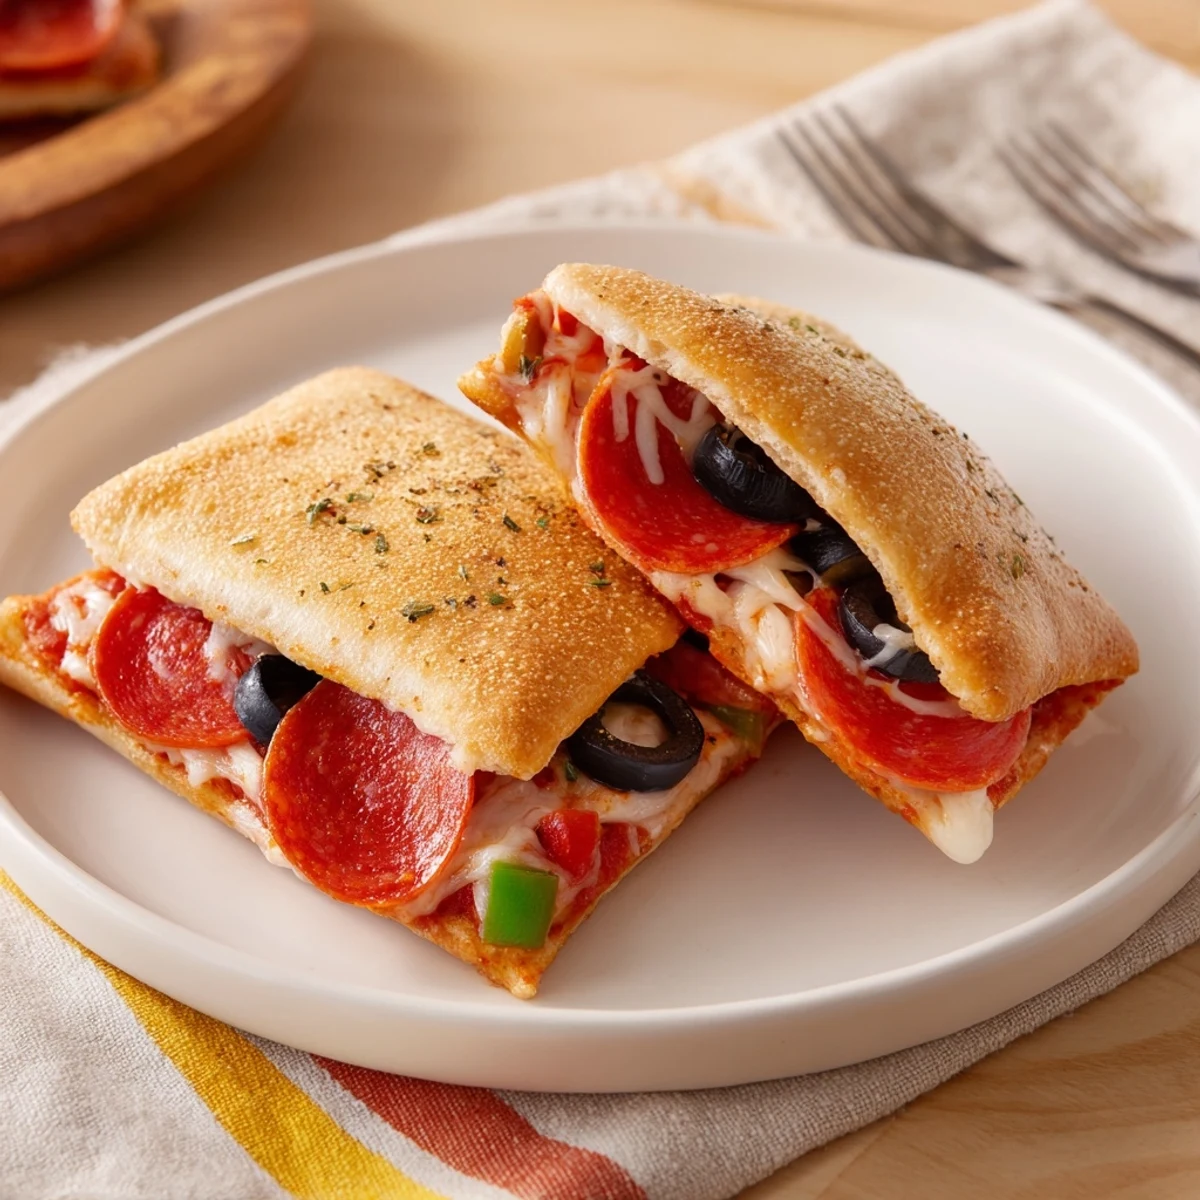
Save A quick campfire method for golden pockets: butter bread, spread sauce, top with shredded mozzarella and chosen toppings, sandwich and seal in a pie iron. Preheat iron 2–3 minutes, cook 3–4 minutes per side until golden and cheese melts. Yields four pockets in about 18 minutes. Swap fillings, use gluten‑free bread, or finish with fresh basil for brightness.
The sizzle of butter hitting hot metal and the scent of toasting bread always reminds me of the easy-going rhythm of campfire cooking. Making Pie Iron Pizza Pockets never requires much planning, just a willingness to improvise with whatever toppings are lurking in the cooler. I once tossed these together while rain pattered on our tent, and somehow wet socks and misty air made that hot cheesy bite even better. They’ve become a little ritual whenever I’m outside with friends.
The first time I made these, my cousin and I held a contest for the strangest-topping combo—he lost spectacularly with pineapple and jalapeño, but we ended up laughing so hard at the smoky chaos that I forgot who was winning. Cooking these together turned into an event, not just a meal, sticky cheese hands and all.
Ingredients
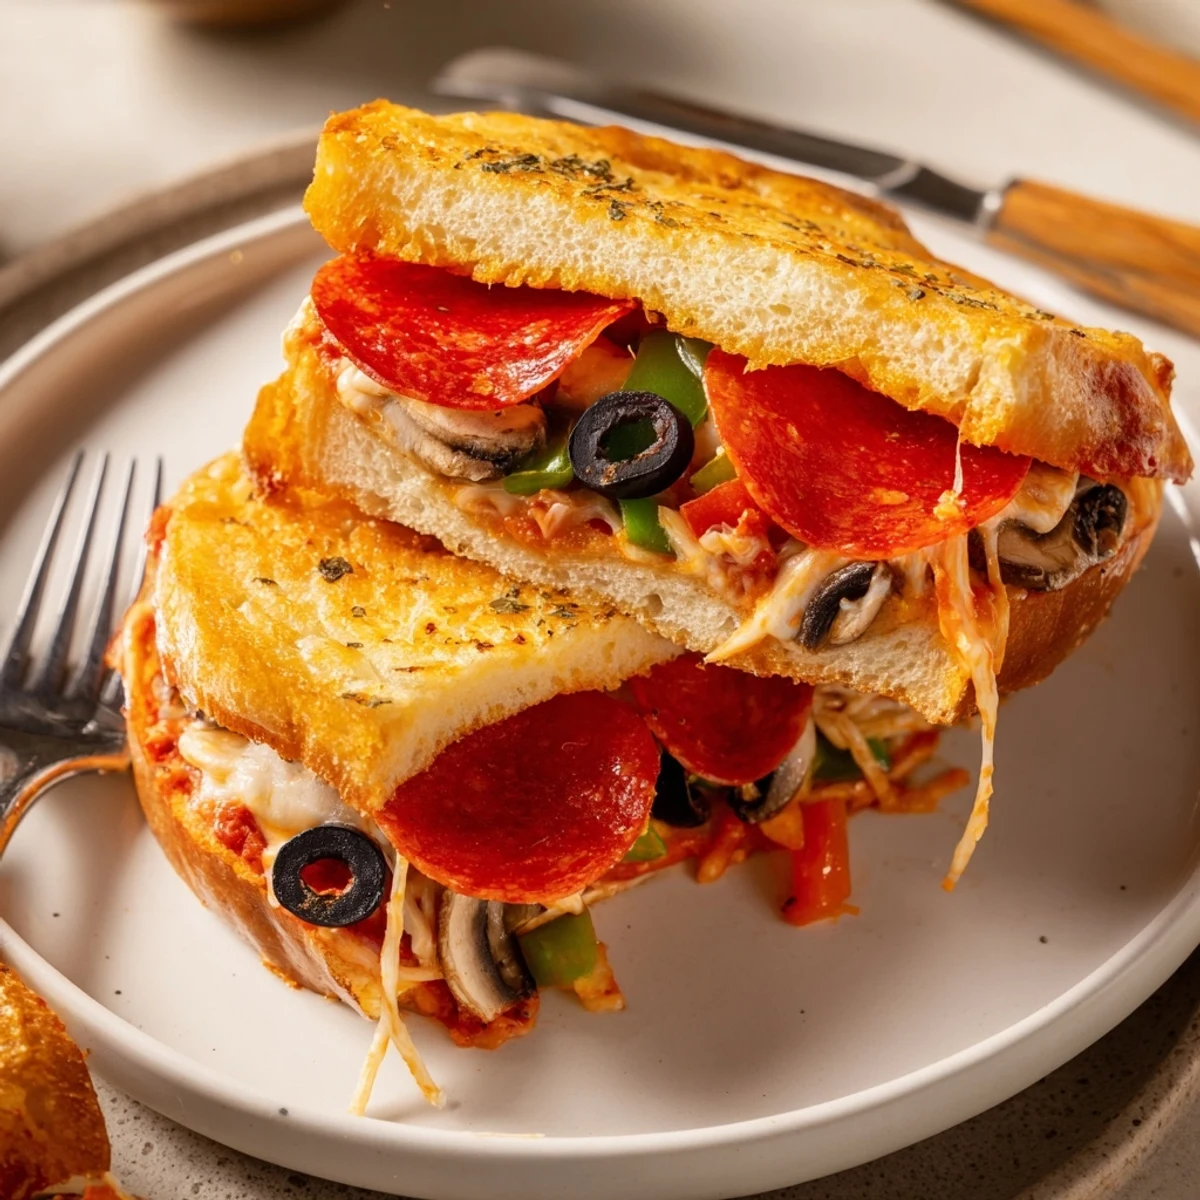
- Bread: Sturdy sliced bread works best; I’ve found whole wheat holds up just as well as white without getting soggy.
- Pizza sauce: It's the base for that classic flavor—go for a thicker sauce if you want less mess inside your pie iron.
- Shredded mozzarella cheese: Melts beautifully and stretches in satisfying, gooey strands—don’t be shy about loading it on.
- Pepperoni or salami (optional): For a meaty bite, but you can skip these or swap for veggies to keep things vegetarian.
- Sliced black olives, bell peppers, mushrooms: These add color, texture, and a little campfire magic—just slice them thin so they heat through quickly.
- Dried Italian herbs (optional): Sprinkling these in gives everything that pizzeria aroma.
- Butter, melted: Brushing the bread is essential for that crackling golden crisp; use a pastry brush or just a spoon in a pinch.
Instructions
- Preheat the pie iron:
- Hold the closed pie iron over your campfire or stovetop for 2–3 minutes, listening for that first hint of warmth when you hover your hand nearby.
- Prep the bread:
- Generously brush one side of each bread slice with melted butter; lay four slices butter-side down on a clean surface—don’t worry if your hands get a little greasy here.
- Add sauce and cheese:
- Spread about 2 tablespoons of pizza sauce over each bottom slice, then pile on shredded mozzarella and your favorite toppings. Sprinkle a pinch of Italian herbs if you’re craving extra flavor.
- Seal the sandwiches:
- Top with the other bread slices, buttered side up, making sure everything’s tucked inside to avoid escapees in the pie iron.
- Load into the pie iron:
- Carefully place each sandwich in the heated pie iron, close and latch, and trim any bread hanging out for a clean seal.
- Cook over heat:
- Set the iron over medium campfire heat and cook for 3–4 minutes on each side, listening for the sizzle and peeking to check for a golden crust.
- Serve up:
- Open the pie iron (watch out for steam), let your pizza pockets cool for a minute, then savor while the cheese is still perfectly melty.
 Save
Save I remember sitting around a sputtering fire with friends, each of us unwrapping our toasted pockets like little surprise packages—we’d swap bites, try each other's flavor experiments, and brag about the gooiest cheese stretch. In those moments, with faces lit by firelight, it felt like we were sharing much more than dinner.
Campfire Experimentation: The Joy of Going Off-Recipe
The best thing about these is you don’t need to stick to the plan. Sometimes, I’ll add arugula or even leftover cooked potatoes; other times, whatever didn’t make it onto a skewer the night before. Embrace happy accidents and use what you have on hand—camp cooking rewards creativity.
Keeping Things Safe and Simple
If you’re cooking with kids, let them fill their pockets at the picnic table while you handle the hot iron. It’s wise to have tongs or heat-proof gloves nearby, and always check that the pie iron is fully cooled before any little helpers get close. Simple tools like a pastry brush or just your fingers make spreading butter a fun (if slightly messy) group job.
Serving and Swapping for Every Guest
My favorite evenings end with a pile of hot pockets and a few creative sides, like crunchy pickles or sparkling lemonade, for an easy camp meal. Swapping marinara for pesto or using gluten-free bread means no one feels left out, a lesson we learned with very grateful friends around our fire.
- Pick your cheese based on meltiness for extra gooey results.
- Bring extra napkins—these pockets can get messy in the best way.
- Don’t skip letting the pockets cool for a minute before eating—the roof of your mouth will thank you.
 Save
Save Whether you make these pizza pockets outside or indoors, the fun is in sharing and seeing what wild combinations your friends come up with. Here’s to smoky fingers and pockets of melty happiness wherever you are.
Your Recipe Questions Answered
- → How long should I cook pockets in a pie iron?
-
Preheat the iron 2–3 minutes. Cook each pocket about 3–4 minutes per side over medium campfire heat or stovetop until the crust is golden and the cheese is fully melted. Times vary with heat intensity.
- → What bread works best for crisp edges?
-
Standard sandwich bread (white or whole wheat) gives an even, crisp finish when buttered on the outside. For a sturdier hold choose slightly firmer slices or press lightly to remove air before sealing. Gluten-free loaves can be used with similar technique.
- → How do I avoid a soggy interior?
-
Use a thin layer of sauce, drain wet toppings, and avoid overfilling. Butter the outer slices to promote browning and preheat the iron well so cooking is quick and seals the pocket.
- → Can I add meats or other fillings?
-
Yes—add pre-cooked sausage, ham, pepperoni or sautéed vegetables. Keep meats thinly sliced and pre-cooked to prevent excess moisture and ensure even heating.
- → What are good alternatives to pizza sauce?
-
Marinara, pesto, or a light garlic‑butter spread complement the cheese and toppings. Choose a spread that won’t overly wet the bread to maintain crispness.
- → How should leftovers be stored and reheated?
-
Cool completely, wrap or store in an airtight container and refrigerate up to 48 hours. Reheat in a skillet or oven to restore crispness; a microwave will warm quickly but may soften the crust.