 Save
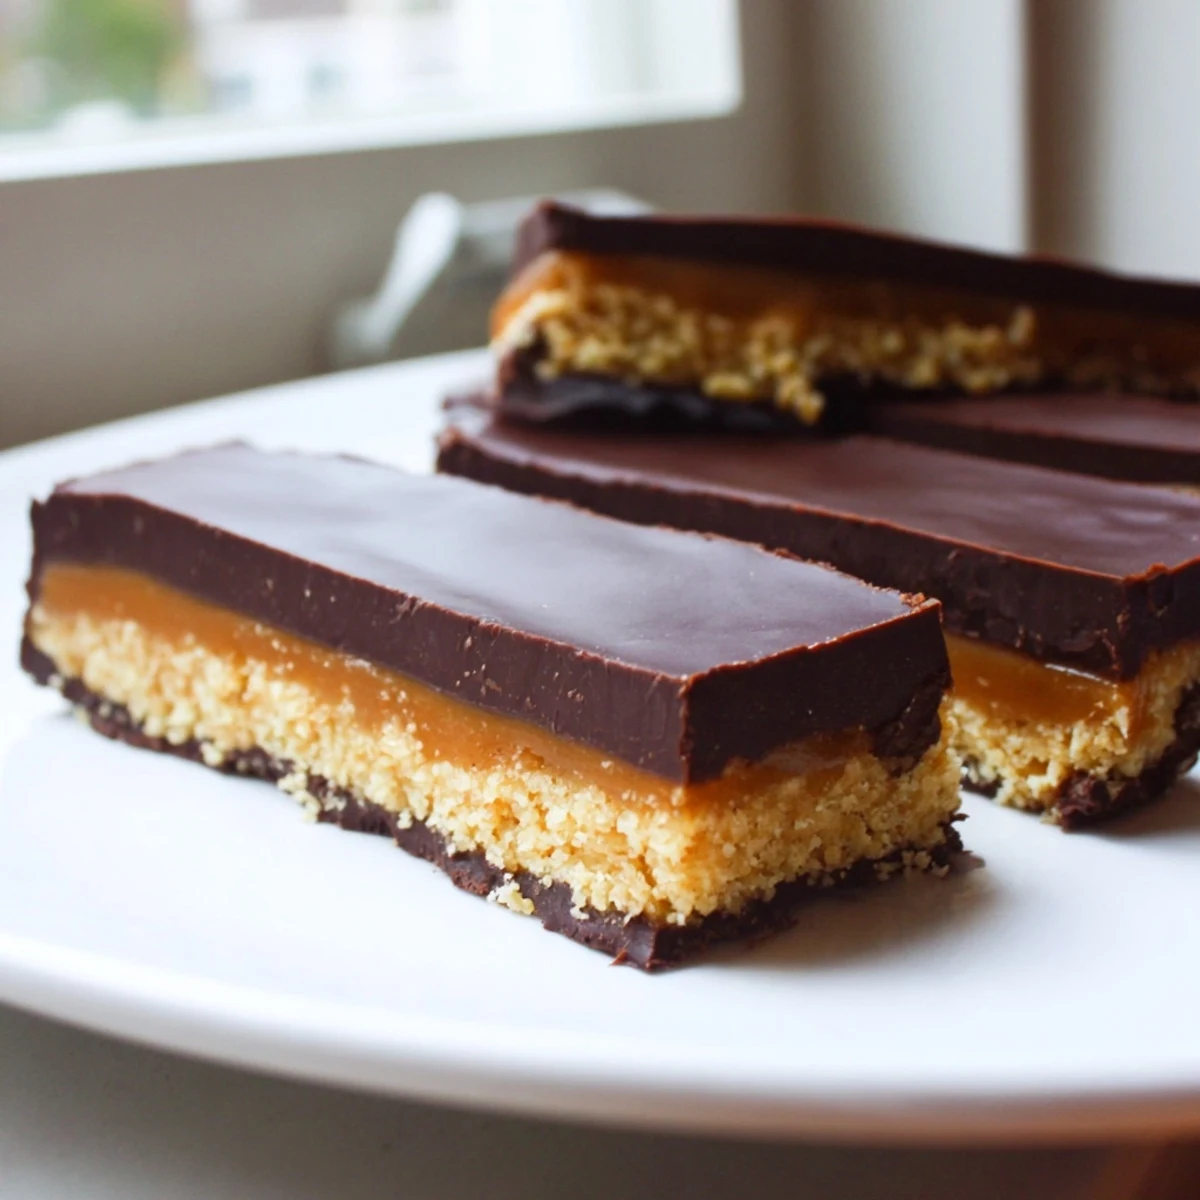
Save These wholesome caramel shortbread bars feature three delicious layers: a crunchy almond and coconut flour base, a silky-smooth date caramel filling, and a rich dark chocolate topping. Each bar delivers the perfect balance of nutty, sweet, and chocolatey flavors while being naturally sweetened with dates and maple syrup. The no-bake assembly makes them incredibly simple to prepare—just freeze between layers. With only 180 calories per bar and naturally gluten-free ingredients, you can enjoy this guilt-free version of the classic treat anytime.
I'll never forget the afternoon my sister skeptically eyed these bars, having just sworn off processed sweets, and then immediately asked for the recipe after one bite. The way these came together was such a happy accident—I was trying to recreate my favorite childhood candy without the sugar crash that inevitably followed. Now they're my go-to when I want something indulgent that doesn't leave me feeling weighed down.
Last summer I made these for a backyard BBQ and watched them disappear in minutes, even among friends who claimed they hated healthy desserts. My neighbor's kids kept sneaking back to the counter, and I eventually had to promise I'd teach them how to make date caramel themselves. There's something magical about seeing people discover that good-for-you can still taste incredible.
Ingredients
- Almond flour: Creates that buttery shortbread texture while keeping things grain-free and nutrient-dense
- Coconut flour: Helps bind the crust together and adds a subtle sweetness that complements the nuts
- Coconut oil: Essential for getting that crisp, hold-together texture when frozen
- Maple syrup: Just enough natural sweetness to mimic the cookie layer without being overpowering
- Medjool dates: The secret to that luscious caramel—soft, sticky, and incredibly sweet
- Almond butter: Adds creaminess and a nutty depth that makes the caramel feel indulgent
- Coconut milk: Thins the date mixture just enough for smooth spreading
- Dark chocolate chips: The crowning glory—dairy-free if needed, but choose quality for the best snap
Instructions
- Prep your pan like you mean it:
- Lining that loaf pan thoroughly with parchment paper will save you so much frustration later when you're trying to remove these beauties
- Press that crust with confidence:
- Use the back of a measuring cup or your fingers to really pack the dough into an even layer—thin spots will make cutting messy
- Blend until you can't resist tasting:
- That caramel needs to be completely smooth, so let your food processor run for a good minute, scraping down the sides halfway through
- Spread with patience:
- Work slowly when layering the caramel—a wet offset spatula or the back of a spoon helps get it perfectly even without disturbing the crust
- Melt your chocolate gently:
- Whether microwave or double boiler, stir constantly and stop just before it's completely melted—the residual heat finishes the job smoothly
- The waiting game pays off:
- Resist cutting into these until that chocolate layer is completely set, or you'll end up with a messy situation
 Save
Save These became my office signature last holiday season, wrapped in little parchment squares with twine. I love watching people's faces when they take that first bite—the confusion that something this healthy could taste so decadent, followed quickly by that knowing smile of dessert satisfaction.
Getting That Perfect Caramel Consistency
I've learned that not all dates are created equal—some are drier than others depending on how fresh they are. If your caramel feels too thick or your food processor is struggling, add another teaspoon of coconut milk until it turns glossy and smooth. The texture should be like thick peanut butter, easily spreadable but not runny.
Making These Your Own
Sometimes I'll press a few extra chopped almonds into the chocolate layer before it sets for that classic crunch, or sprinkle sea salt on top for a sweet-salty moment. You could also swap in cashew butter or sunflower seed butter depending on what your pantry holds and who you're feeding.
Storage and Serving Secrets
I cut these while they're still frozen but let them thaw for those five crucial minutes before serving—they cut cleaner that way and the texture is perfect. Store them in the freezer for up to three months, though they've never lasted longer than a week in my house.
- Stack between parchment squares in an airtight container to prevent sticking
- Let dinner guests serve themselves from the fridge for optimal firmness
- Keep a secret stash in the back of the freezer for emergency chocolate cravings
 Save
Save There's something deeply satisfying about making a treat that loves you back as much as you love it. Happy healthy indulging!
Your Recipe Questions Answered
- → How long do these bars need to freeze?
-
Each layer needs chilling time: 15 minutes for the crust, 30 minutes for the caramel layer, and another 30 minutes for the chocolate topping. Total freezing time is approximately 1 hour 15 minutes, plus additional time for easier cutting.
- → Can I make these bars nut-free?
-
Yes, substitute almond flour and almond butter with oat flour and sunflower seed butter respectively. This maintains the texture while accommodating nut allergies, though note that oat flour contains gluten unless certified gluten-free.
- → What's the best way to store these bars?
-
Store in an airtight container in the refrigerator for up to 2 weeks. For longer storage, freeze individually wrapped bars for up to 3 months. The texture remains firm and chewy when chilled.
- → Why use Medjool dates specifically?
-
Medjool dates are larger, softer, and moister than other varieties, making them ideal for creating a smooth, creamy caramel texture without added sweeteners. Their natural richness provides deep caramel flavor.
- → Can I use a different pan size?
-
An 8x8 inch square pan works well for thinner bars, though you may need to adjust chilling time slightly. A 9x5 inch loaf pan creates slightly thinner bars than specified but maintains good layer proportions.
- → Is there a substitute for coconut oil?
-
Butter works in the crust and chocolate layer if dairy is permitted. For the chocolate topping only, refined coconut oil has less coconut flavor. The oil helps the chocolate set properly at room temperature.